What are herringbone tiles?
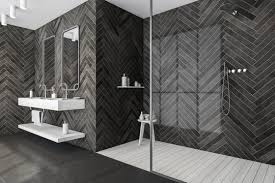
Herringbone tiles are a type of tile pattern that is laid out in a zigzag shape, resembling the bones of a herring fish. This pattern is created by laying the tiles at right angles to each other to form a distinctive "V" shape. Herringbone tiles can be used on floors, walls, or in backsplashes to create a unique and visually appealing design. They are popular for adding a modern and sophisticated touch to any space.

Types of herringbone tiles
Herringbone tiles come in various materials, including ceramic, porcelain, and marble. Ceramic herringbone tiles are durable and easy to maintain, making them a popular choice for beginners. Porcelain herringbone tiles are also durable and resistant to moisture, making them suitable for both indoor and outdoor applications. Marble herringbone tiles add a touch of elegance and luxury to any space, but they require more maintenance compared to ceramic and porcelain tiles. When choosing the type of herringbone tiles, consider factors such as the intended location, desired style, and maintenance requirements.
Choosing the right herringbone tiles for your project
Herringbone tiles come in various materials such as ceramic, porcelain, marble, and wood. Ceramic and porcelain tiles are durable and more affordable, making them suitable for high-traffic areas. On the other hand, marble and wood herringbone tiles are elegant but require more maintenance. Consider the color and size of the tiles to match the style of your project, and ensure they are suitable for the specific area where you plan to install them.
Tools and materials needed for installation
To install herringbone tiles, you will need:
- Herringbone tiles
- Tile adhesive
- Tile spacers
- Tile cutter
- Measuring tape
- Notched trowel
- Grout
- Grout float
- Level
- Sponge
- Bucket for mixing grout and adhesive
Having these tools and materials ready will ensure a smooth and successful installation of herringbone tiles.
Preparing the surface for herringbone tile installation
Before you start laying the herringbone tiles, it's important to ensure that the surface is clean, smooth, and free from any debris. Here are the key steps to prepare the surface:
- Clean the surface: Thoroughly clean the floor and remove any dust, dirt, or grease. Use a suitable cleaner and make sure the surface is completely dry before proceeding.
- Check for evenness: Use a level or straight edge to check if the surface is level and even. If there are any uneven areas, you may need to use a self-leveling compound to create a smooth and flat base.
- Repair any damage: Inspect the surface for any cracks, holes, or imperfections. Fill in any holes or cracks with a suitable patching compound and allow it to dry completely.
- Apply primer: Depending on the type of surface, you may need to apply a suitable primer to ensure proper adhesion of the mortar or adhesive for the herringbone tiles.
By making sure the surface is properly prepared, you can ensure a smooth and successful installation of herringbone tiles.
Setting up the herringbone pattern
Before you start setting up the herringbone pattern, it's important to prepare the surface by ensuring it is clean and even. Use a suitable adhesive and start laying the tiles from the center of the room, working outwards. Position the tiles at a 45-degree angle to create the herringbone pattern, ensuring they are aligned perfectly. Once the tiles are laid out, allow sufficient time for the adhesive to set before grouting the tiles. Remember to measure and cut the tiles accurately to maintain the pattern's integrity.
Step-by-step guide to installing herringbone tiles
Installing herringbone tiles can be a fun and rewarding project, even for beginners. Here is a step-by-step guide to help you through the process:
- Begin by preparing your surface, ensuring it is clean, dry, and level.
- Lay out your tiles in the herringbone pattern before applying adhesive to ensure a proper fit.
- Apply the adhesive to the surface and start laying your tiles, making sure to maintain the herringbone pattern.
- Use tile spacers to ensure even spacing between the tiles.
-
Once the tiles are in place, allow the adhesive to dry completely before grouting.
Remember to measure accurately, take your time, and enjoy the process of creating a beautiful herringbone tile pattern in your space.
Grouting and finishing touches
Now that your herringbone tiles are in place, it's time for the finishing touches. After applying the grout between the tiles, make sure to wipe off any excess grout from the surface of the tiles with a damp sponge. This will help to achieve a clean and polished look. Once the grout has dried, use a soft cloth to buff away any remaining haze on the tiles. Finally, remember to seal the grout to protect it from staining and water damage. These final steps will ensure that your herringbone tile installation looks professional and lasts for years to come.
Common mistakes to avoid during herringbone tile installation
To avoid common mistakes during herringbone tile installation, it's important to pay attention to the following tips:
- Not properly measuring and planning the layout: Take the time to measure and plan the layout of your herringbone tiles properly. This will help you avoid awkward cuts or misaligned patterns.
- Ignoring tile spacers: Using tile spacers is essential to maintain consistent grout lines and ensure a uniform herringbone pattern.
- Skipping surface preparation: Make sure your surface is clean, flat, and properly prepared before installing herringbone tiles to avoid issues with adhesion and alignment.
- Neglecting proper cutting and handling of tiles: Take care when cutting and handling the tiles to avoid breakage or damage that can disrupt the pattern.
By being mindful of these common mistakes, you can ensure a successful herringbone tile installation for a beautiful and professional-looking result.
Maintenance and care tips for herringbone tiles
Herringbone tiles require regular maintenance to keep them looking their best. Here are some tips to help you care for your herringbone tile installation:
- Clean regularly: Wipe the tiles with a damp cloth or mop to remove dirt and grime.
- Use mild cleaners: Avoid harsh chemicals that can damage the tiles. Stick to pH-neutral cleaners for routine cleaning.
- Seal the grout: Apply a grout sealer to protect the grout from staining and discoloration.
- Avoid abrasive materials: Use soft cloths or sponges to clean the tiles, and avoid scrubbing with abrasive materials that can scratch the surface.
-
Address spills promptly: Clean up spills as soon as possible to prevent staining.
With these simple care tips, you can ensure that your herringbone tiles maintain their beauty for years to come.